Last Updated on February 18, 2023
For those of you that are living in small spaces but with a staircase in the house, you might face a problem of not being able to accommodate your dog’s crate in the house at all. Indeed, some owners have resort to allowing their dogs to sleep in the room with them, or even on the patio. While these options might not be that shabby, why not consider doing some space management at home? What I am saying is, why not consider doing up dog crates for under stairs?
Dog Crates For Under Stairs
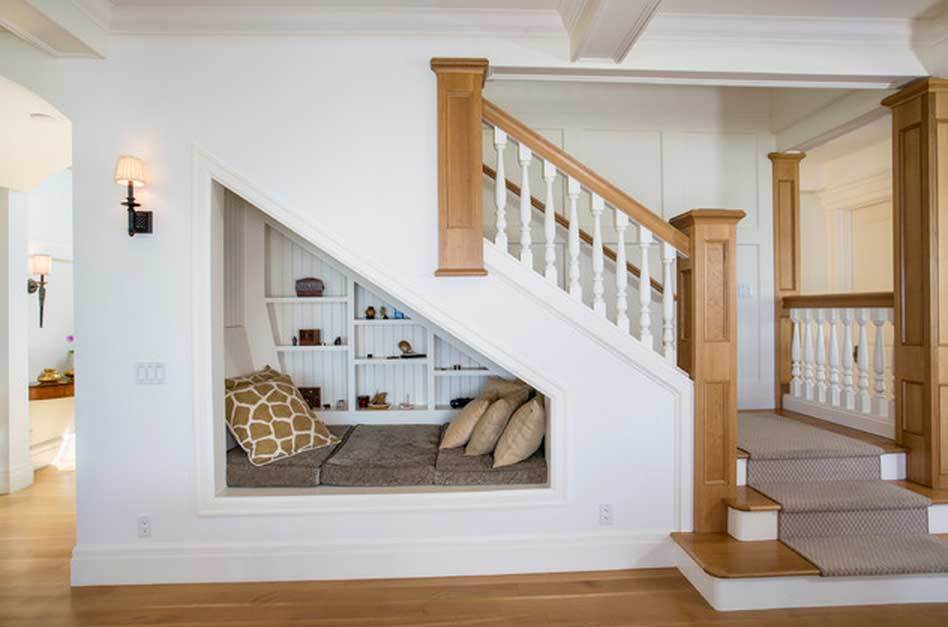 The dog crates for under stairs is one of the best ways to manage the space underneath the stairs. More often than not, the space is often wasted by mismanagement. Just imagine, how nice it would be if the space underneath the stairs is completely utilized? This is completely achievable if you managed to DIY dog crates for under stairs.
To actually build up the dog crates for under stairs, you really have to understand that there is no ‘perfect dog crate for under stairs’ that is being developed by the various companies. True enough, we have the Unbreakable Heavy Duty Dog Crate, the Designer Dog Crate Furniture as well as the various dog crates. Not all of the dog crates will fit the space underneath the stairs properly. This is because the space underneath each stair is really unique to the house.
In addition, the requirements of each owner might be different. Some owners might prefer to design a DIY dog crate for under stairs that are completely flushed to the steps of the stairs. Or some owners will prefer a cozy looking dog crate or dog house to be built underneath the stairs. Whichever the design, the steps to conjuring up the DIY dog crate for under stairs is actually the same. The main difference will just be the interior furnishing, which you can buy most of it from Amazon.
Assess The Space
The first step in utilizing the space under stairs with dog crates is to assess the available space. Measure the area and take note of any obstructions such as plumbing, electrical wires, or support beams. This will help you determine the best crate size to fit the space and ensure your pet will have enough room to move around comfortably.
DIY Dog Crate For Under Stairs
To develop your own DIY dog crate for under stairs, you have to be prepared for some work to be done. These steps are actually very easy to follow, and you really do not need to have any background in handiwork to get the items done.
Just before we get started, you will need to figure out if the area at which you wish to have an in-stairs dog house does have a stud or not. If you have a stud, then you really got to work around it. If not, here are the steps to detecting a stud in the wall.
Steps For Detecting Stud In Wall
- Shine a flashlight against the wall at which you wish to detect the presence of a stud. Shine it at an angle, and look for bumps or dimples on the surface of the wall itself. If there are any of these, then it is more or less confirmed that there is a stud in the wall. This is because the bumps and dimples are caused by nails that are securing the surface of the walls to the studs.
- If you locate the presence of a stud, measure about 16 – 17 inches or 24inches inches away from it. This should be the approximated location of the next stud. A good way to determine is to knock on the walls with a knuckle. If the wall is hollow, you should be hearing a hollow sound as compared to a solid sound.
Alternatively, you can use a stud finder to help you accurately determine the presence of a stud.
Items You Will Need For DIY-ing Dog House In-Stairs
These are the items that you will need when you wish to design and build your own DIY dog house in the stairs.
- Drywall Saw- We recommend DEWALT DW660 Cut-Out 5 Amp 30,000 RPM Rotary Tool
- Reciprocating Saw- The best is DEWALT DWE305 12 Amp Corded Reciprocating Saw
.
- Hacksaw
- Dremel Multitool
- Drywall
- Door Trimmer
- Drills
- Light
- Door
Of course, you will need your common household tools too.
Step 1 : Determine the Location Of DIY Dog Stairs
This shall be the very first step that you should take. Always find out the place at which you wish to design and build your very own in-stairs dog house. Preferably, you should avoid having to drill or cut into studs. We have previously covered how to locate studs.
There are several factors that will actually affect your choice of location for the DIY dog stairs. The top reason will be that the size of the door that you have chosen will determine the exact width at which you wish to cut into the drywall. Also, you will need to figure out if the area is big enough for your dog to enter and enjoy.
Step 2: Determine Design
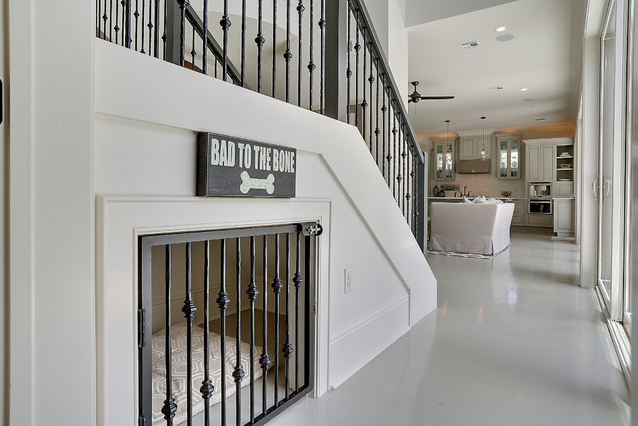
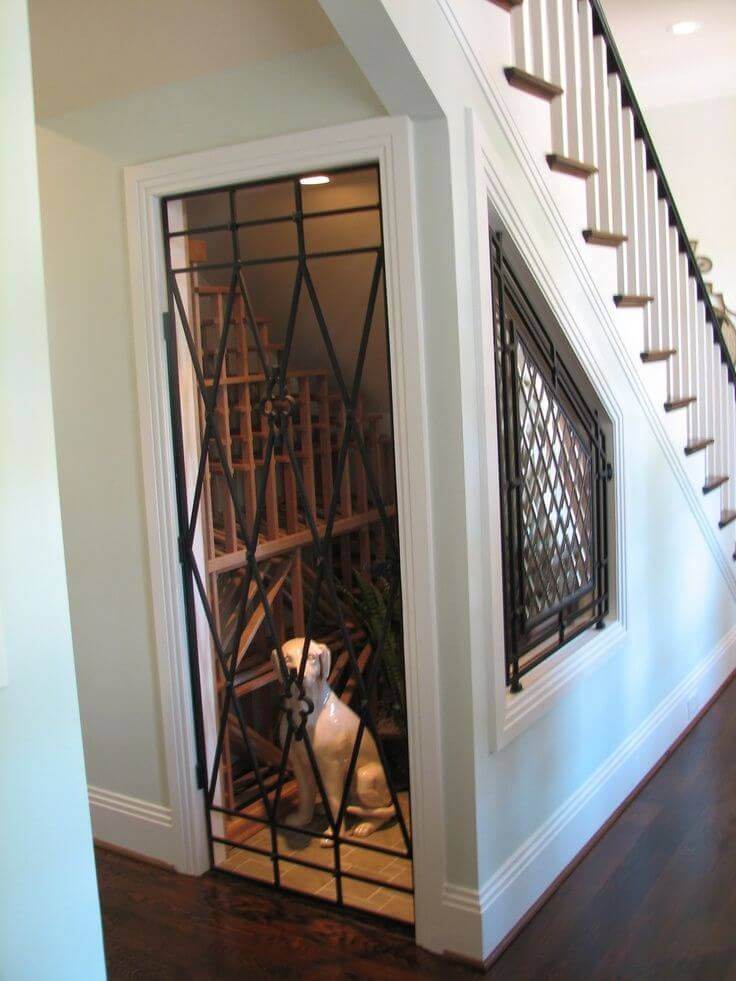
Once you have the location sought out, it will be important for you to decide on the design that you want. There are various sources of this, and here are some of our top picks in terms of designs.
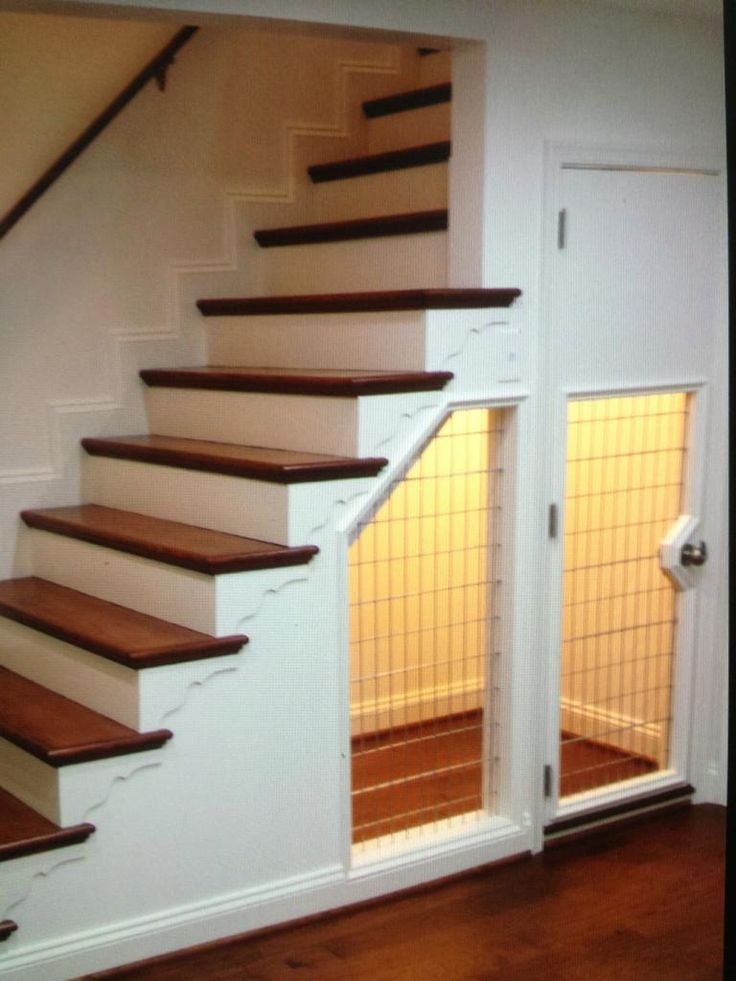
These are just some of the top few DIY Dog Crate For Under Stairs that you can use as a reference. Notice that all three of them are vastly different from one another. The 1st design has a DIY dog house that is pretty near to the steps. The second one is directly beneath the flat platform. The third one has an orientation that is different from the rest.
Step 3: Choosing The Gate
Once you have decided on the design that you wish to have, you will then need to choose the gate itself. This will be the determining step to ensuring that you love what you see. What I am saying is, that you should be selecting a gate that you like based on the aesthetics of your house. Also, the ability of the gate to secure your dog will be a consideration that you should take too. You can find some of our reviews on the gates for dogs.
Step 4: Cutting Out The Shape
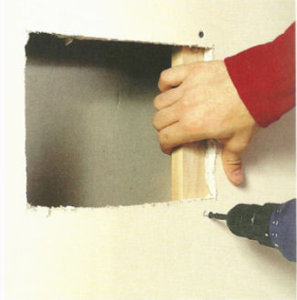 Once the above three steps have been done, it should mean that you have a clear idea of what you are really expecting and designing. You should then proceed on to cut a hole in the drywall using the drywall saw. Do note that you are not expected to cut a big hole in the wall just yet. You should cut a small opening that allows you to peek inside the area. This is a complete necessity to ensure that there are no hidden surprises that might thwart your plans. Once you are clear that the space underneath the stairs indeed could be used for housing the DIY dog crate, then you should proceed on.
Generally, we advise homeowners to mark out the area at which you are trying to remove. This will give you a guide on the exact area that you should be removing. Always remember that you will need to consider the height and the width of the gate that you are going to use. This includes the hinges too.
Once the hole is big enough, you should remove all materials that are present in the space itself. If there are things that require you to cut, you should use the Dremel multi-cutting tool. This includes the baseboard or even the quarter-round.
Step 5: Installing Lights
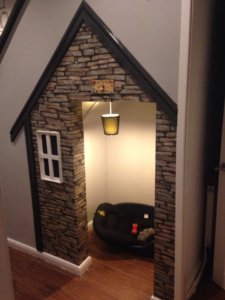 Once the hole has been cut, you should then proceed to install a provision for light. Usually, I will cut away a smaller hole to allow wires to pass through and fix it on the inner drywall of the DIY dog house.
There are various ways to which you can attach the light. It can be at the inner side of the drywall, or you can attach it to a false ceiling off the bottom of the stairs. The latter will require some additional work in installing a false wall.
Another way to circumvent the issue is to install a hanging light. In this manner, you do not need to reinvent anything at all.
Step 6: Leveling Floor And Installing Drywall
Now, we are nearing the completion of the DIY dog house. The next step is to settle any flooring issues. Usually, I would recommend that you flush the floor to normality. This will ensure that your dog could enter and exit the DIY dog house under stairs without any trouble.
To keep things simple, just use the same flooring as per the one that you are doing for your house.
Once the floor is done, you should do up drywall if needed. This is to cover or hide any unsightly parts of the dog house under stairs that might make the dog house an ugly one.
Step 7: Install Chipboards
Before you install the hinges on the wall, you should always nail chipboards onto the drywall first. Chipboards are readily available at the local hardware store.
Step 8: Installing Door
Once the above is done, you can proceed with installing the door or the gate onto the chipboards itself. Drill holes in the chipboards and attach the hinges to them.
Viola! Your DIY Dog House Under Stairs is done!
What Else Can You Put In The DIY Dog House Under Stairs
There are several other items that you can buy to beautify the dog house. You can always put signages outside the doghouse, or you can also buy dog beds too. Heck, we strongly recommend you to purchase dog beds for the DIY dog house under stairs!
Proper ventilation is essential when creating a living space for your pet. Ensure that there is enough air circulation to keep your dog comfortable and healthy. If the space under stairs is not well-ventilated, consider installing a ventilation system or adding a small window to allow fresh air in.
Conclusion
utilizing the space under stairs with dog crates is a great way to provide a comfortable living space for your pets, especially if you live in a smaller home. By following these tips and guidelines, you can create a stylish and functional living area that both you and your pets will love. So why not make the most of that unused space under the stairs and create a cozy home for your dog?
 Dog N Treats All dogs deserve to be pampered
